Difference between revisions of "Tilt-Over Mast"
From The RadioReference Wiki
| Line 57: | Line 57: | ||
http://i21.photobucket.com/albums/b287/tonsoffun26/Tilt-Over%20Mast/100_1160.jpg | http://i21.photobucket.com/albums/b287/tonsoffun26/Tilt-Over%20Mast/100_1160.jpg | ||
| − | This is the top flat bar that holds the mast. | + | This is the top flat bar that holds the mast.Note:The other side of this plate and the bottom plate is welded to the base and the bolt is welded in place also, only the one side comes off. |
http://i21.photobucket.com/albums/b287/tonsoffun26/Tilt-Over%20Mast/100_1161.jpg | http://i21.photobucket.com/albums/b287/tonsoffun26/Tilt-Over%20Mast/100_1161.jpg | ||
Revision as of 19:46, 9 July 2006
Here is some info for a Tilt-Over mast that I am constructing and hopefully give some IDEAS for people to build for their scanner antennas. Please remember that this is only to give people ideas and is not an engineered structure. Remember that you can be KILLED if you hit any power lines with this mast. I wanted something that will be easy to lower and raise and mostly be very safe to work on. When building this mast you should get a good qaulity winch to raise and lower the mast. I bought a motorized winch(2000LBS) that has a brake so when raising and lowering the mast and you let go of the buttons, it stops right away.I bought it on sale for $59.00. The hand winch I wanted was $50.00 so I went with the Motorized since it was only $9.00 more. People that are thinking of building this would need a welder. If you don't have one you can get a welding shop to weld up the base for you.
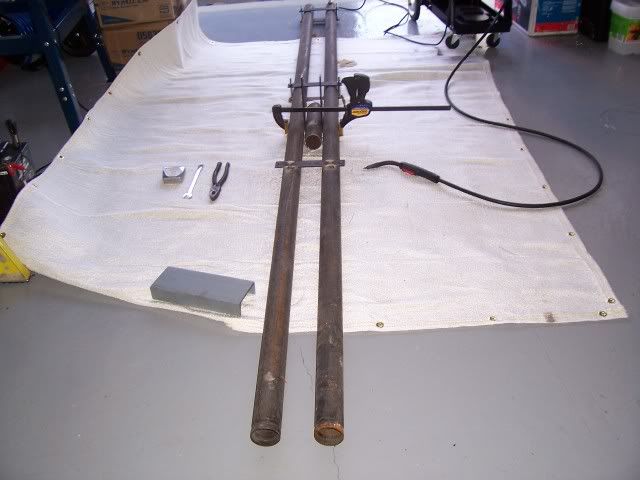
I got the idea from a old Fire Hall that had a mast to hold there flags up. From there I had this picture in my head for my scanner antennas. So I started thinking about materials to build this monster mast and started to design it different. They had C-channel for the base coming from the concrete that is in the ground. I needed some pipe for the mast so why not have the pipe for the base as well. I went to a plumbing supplier and looked for a pretty solid pipe, so the store employee directed me to 2" Schedule 40 pipe. They come in 21 foot lenghts. I wanted more height then that and also purchase some 1 1/2" Schedule 40 pipe 21 foot to fit in the 2" pipe. So I bought another 2" schedule 40 pipe 21 foot long for the base. So total material so far is: 2 pcs 21'x2" schedule 40 pipe 1 pcs 21'x1 1/2" schedule 40
Okay, here is the base that is starting to take place. I took one lenght of pipe that was 21' long and cut it to make 2 pcs of 10' long. 5' is going into the concrete and 5' is the top.
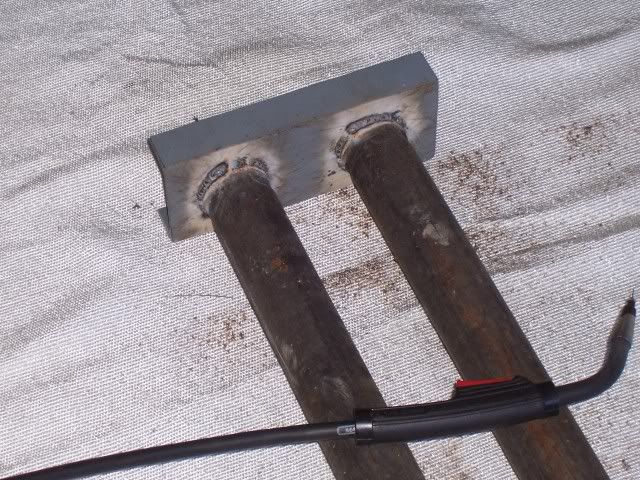
The little piece of pipe in the middle is just a spacer with some additional 3/16" flat bar for spacing. The flat bar that are welded on the top is 3/16"x10" and holds the the base pieces together and will show its purpose in another photo.
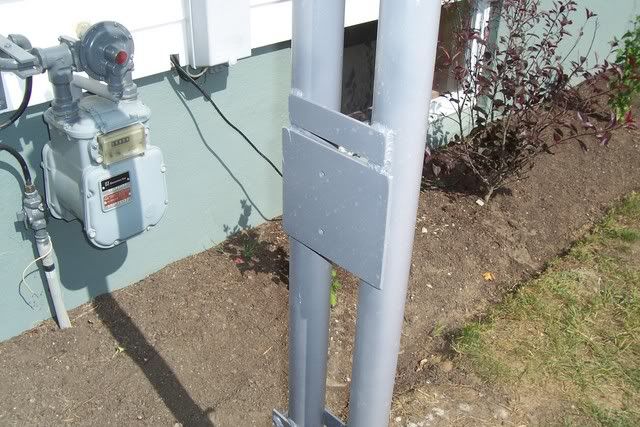
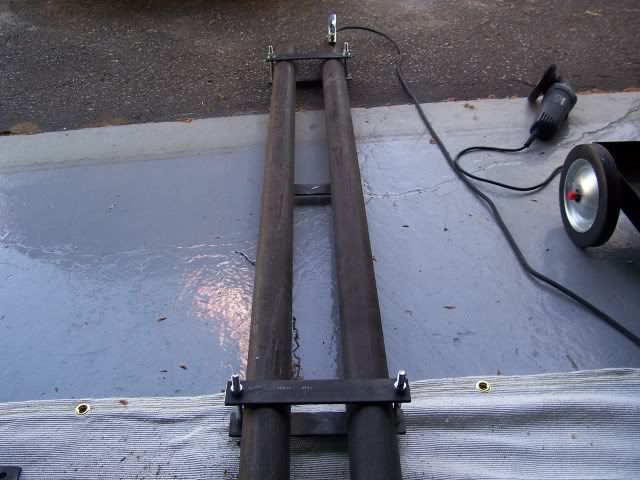 This is the top part of the base that is not going to be in the concrete. The space in the middle is where the mast is going to go.
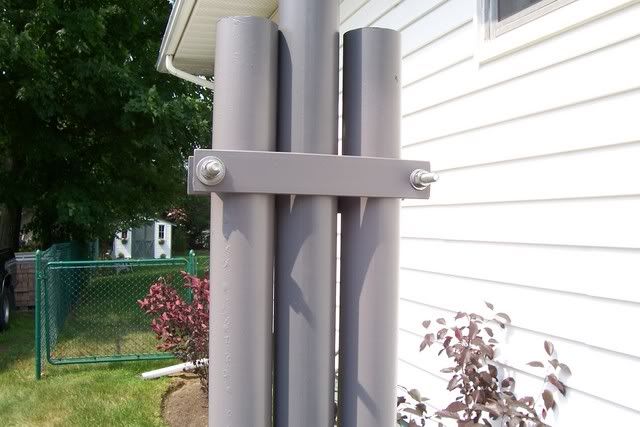
As you can see, those bolted plates do come off when the mast is going to be lowered.The other flat bar in the middle is where the winch is going to be attached.
This is the top part of the base that is not going to be in the concrete. The space in the middle is where the mast is going to go.
As you can see, those bolted plates do come off when the mast is going to be lowered.The other flat bar in the middle is where the winch is going to be attached.
 Here is the bottom of the base that is going in the hole. I will add some gravel for drainage before putting the concrete.
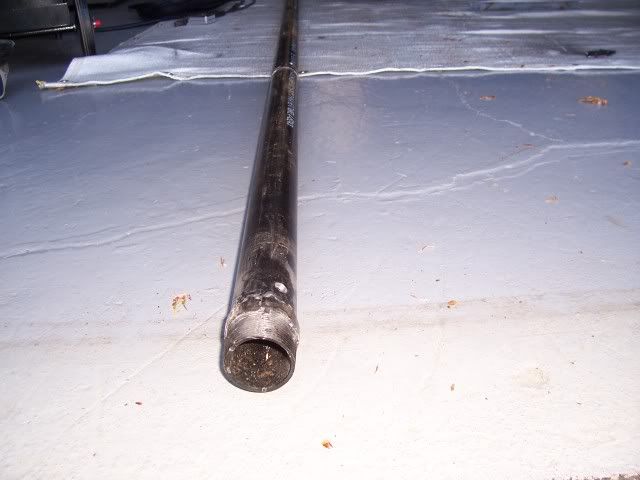
 This is the 2" bottom mast that is drilled with a 3/8" hole in 2 areas for the 1 1/2" mast.This way it is going to be easy when inserting the 1 1/2" pipe to have the pipe marked then drilled.
 This is the 1 1/2"x21' long mast.This is going to be inserted in the 2" bottom mast mast.
If you look closely, you will see to little rings that I made up so when inserted in the 2" mast it will fit nice and snug.This is done in the first 3 foot part of the 1 1/2"x21'. Then just above the first ring I drilled a 3/8" hole right throught the mast and also do this above the second spacer ring.
After welding the rings in place I tried to insert the the masts together but had to grind a little all around the ring to size it up properly.
After grinding a bit, the 1 1/2" top mast fit perfectly in the 2" bottom mast with little movement.
I drill the 2" mast pipe first so I can mark the 1 1/2" once it fit properly.
This is the 1 1/2"x21' long mast.This is going to be inserted in the 2" bottom mast mast.
If you look closely, you will see to little rings that I made up so when inserted in the 2" mast it will fit nice and snug.This is done in the first 3 foot part of the 1 1/2"x21'. Then just above the first ring I drilled a 3/8" hole right throught the mast and also do this above the second spacer ring.
After welding the rings in place I tried to insert the the masts together but had to grind a little all around the ring to size it up properly.
After grinding a bit, the 1 1/2" top mast fit perfectly in the 2" bottom mast with little movement.
I drill the 2" mast pipe first so I can mark the 1 1/2" once it fit properly.
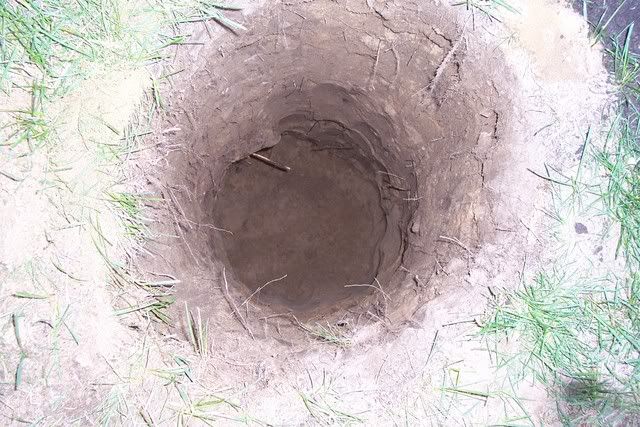
I finally got some time and some help to start digging my hole thanks to my nephew.
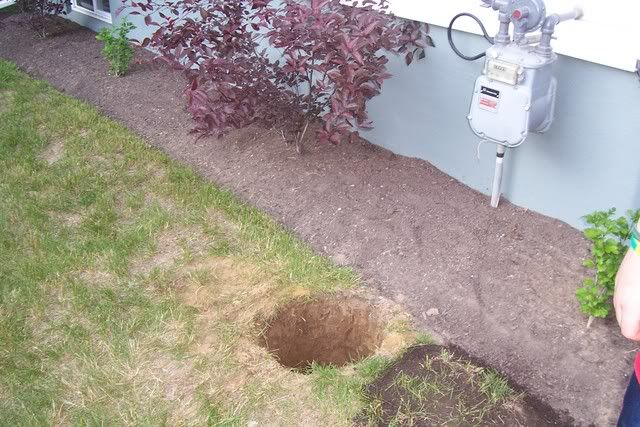 It does not look like it but the hole is 14" diameter and 5' deep. The hole was dug more on the angle towards the bottom for frost and to be more stable. So the bottom of the hole is probably around 16" to 17" diameter.
 Finally got a chance to put the base in the hole. It took 10 bags(30KG) to fill the hole! The Corona tasted so good after I was done. I braced the base with 2 2x4's and made sure it was all plumb and good. It turned out perfect.
 Here is the mount for the motorized winch($59.00) to be bolted. The winch was on sale and was a little more then the hand winch($50.00) so I went with the motorized. Plus it is better since there is a brake when raising or lowering in case of an emergency.
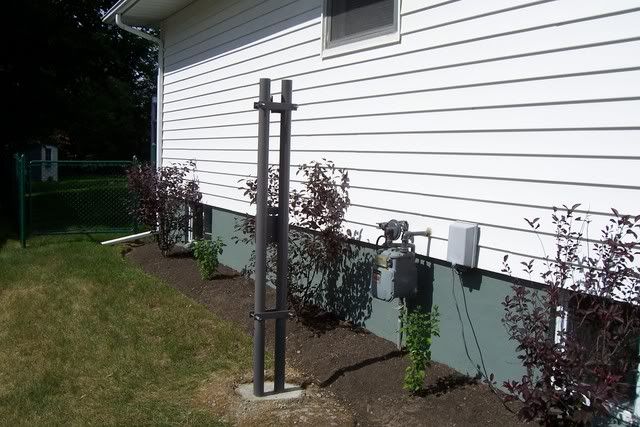
 Now to start painting the mast to mount in the centre of the base and hopefully everybody is starting to get what I am trying to do.
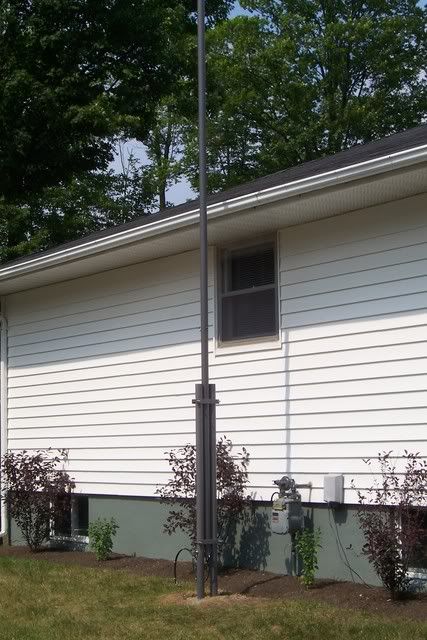
Here is the mast installed.
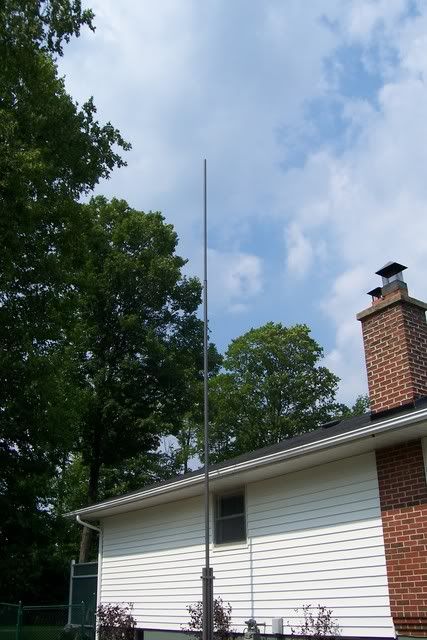
Here is another full shot of the mast
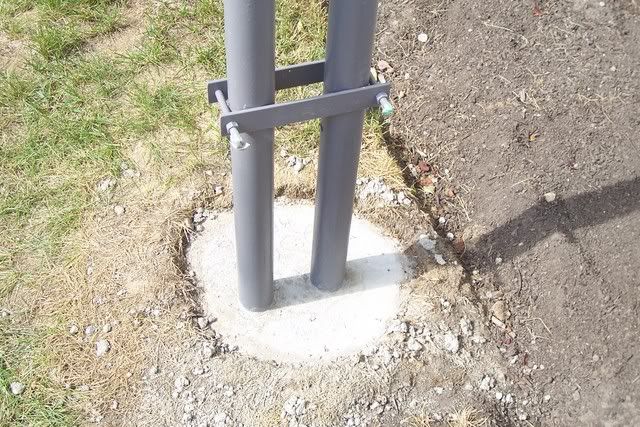
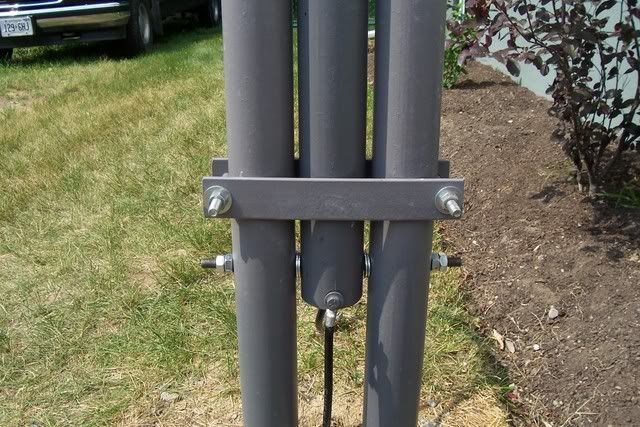
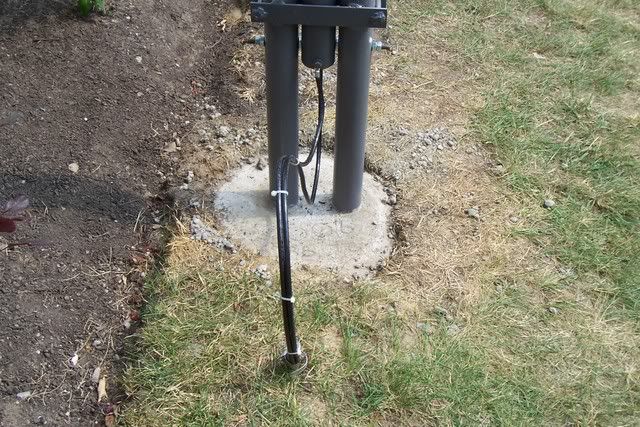
Here is the base of the mast where it pivets on the bolt and as you can see the grounding cables.
This is the top flat bar that holds the mast.Note:The other side of this plate and the bottom plate is welded to the base and the bolt is welded in place also, only the one side comes off.
Here is the other side of the grounding cables
Will soon put some pics up of the operation of the winch.
Now to install the rotor and antennas!
Still under construction so look for updates. Take care Tonsoffun