Difference between revisions of "Freescan Downloads"
From The RadioReference Wiki
| Line 9: | Line 9: | ||
''Click on the image to expand''<br> | ''Click on the image to expand''<br> | ||
| + | |||
| + | This function can be accessed via the scanner pulldown menu (figure 1), the scanner symbol at a diagonal from '''View''' in the toolbar or CTRL-D from the keyboard | ||
#Select 'download programming' from the pulldown menu (Figure 1) | #Select 'download programming' from the pulldown menu (Figure 1) | ||
Revision as of 17:34, 5 April 2009
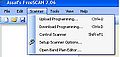
Figure 1
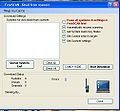
Figure 2
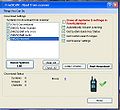
Figure 3
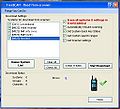
Figure 4
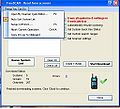
Figure 5
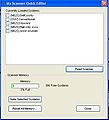
Figure 6


Click on the image to expand
This function can be accessed via the scanner pulldown menu (figure 1), the scanner symbol at a diagonal from View in the toolbar or CTRL-D from the keyboard
- Select 'download programming' from the pulldown menu (Figure 1)
- The download screen appears. Check to see all the options on the right are the ones you want. Click 'Queue System List' (Figure 2). If you wish to also download the various scanner settings, such as those for Quick call, search ranges, Fire Tone out, and so on, be sure to check the 'Get Scanner Settings' box.
- The list of available systems in the scanner is shown (figure 3). Deselect/Select those systems to be downloaded and click the 'Start Download' key
- Figure 4 shows a typical result. Examine the number of errors. If it seems high, you may need to uncheck the Turbo mode, or if running in Linux, click the Linux mode and reexecute.
- If a COM error is encountered (cannot connect, too many errors, ect.) click on the 'Freescan' link in the upper left corner. Select 'Setup Com Port' from the pulldown, as shown in Figure 5. See our Making the Connection article for more information.
- The Quick Editor (figure 6) can be used to quickly delete an entire system from the scanner. To remove a system, first hit 'read scanner', then click on the desired system. Hit 'Nuke Selected Systems'. 'Reset All Memory' will clear the scanner memory so use with caution.
Return to the FreeScan User Guide