Freescan RR Conv Import
From The RadioReference Wiki
- FS RR conv preview v8.JPG
Figure 5
Click on the image to expand
- From the file pulldown select Import then RadioReference Conventional (figure 1). For a moment, your subscription expiration date will flash on the left lower corner of the form
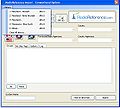
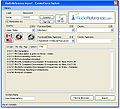
- On the RadioReference screen, enter your RadioReference Userid and Password. Click on the Options tab (figure 2). Once you are signed on, you can use the History pulldown to return to a previously-utilized RR site. Note the hotkeys are accessed with ALT and a number
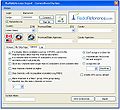
- If you are programming a 246, 330 or BCT15 clicking on 'skip channels marked as digital' will prevent the download from grabbing P25 conventional frequencies (figure 3)
- DMA scanners have a limit of 20 groups per system. This can be an issue when importing certain systems because they contain many subcategories that only have 1 frequency in the entire group and some would consider entirely wasting space. A new feature has been added that lets you select the minimum number of channel that should appear in their own group. For example, if you set it to 3, any group with less then 4 frequencies will still be imported but its channels will all be placed in a miscellaneous group. -This is great for rural areas where you get these behemoth systems that have 30, 40, or 50 groups with only one or two frequencies per group compressed down to one system with a Misc group that contains all the respective frequencies. Larger sized subcategories will continue to be imported as their own groups. To activate this function, click on the last option that begins with Place Channels and select the number of frequencies from the pulldown
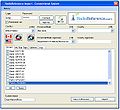
- Click the 'Connect' button. In the lower left corner, you should eventually see a 'Download OK' message. Select your country (the flags can be used for the US and Canada). Wait until all systems have been downloaded. A number will appear near each pulldown box. Select the agency, state and other information as needed (figure 4). Groups and Frequencies will be loaded into the screen.
- You can set up a home location once you have selected your options by clicking the blue button with the house near it
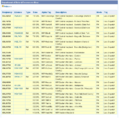
- To preview the setup for the group (figure 5), highlight the desired group by clicking on it, then click on the 'Preview Group' button. Note that as you select a group, what the group looks like is shown as a preview automatically
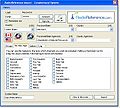
- You may now select data to be skipped by tags that are available in the database. Place a checkmark in the box for the tag whose data you wish to ignore, and that data will not be imported (figure 6)
- Be sure to click on the box next to the group if you wish to import it. A check mark will appear. The 'none' button clears all the groups import selections. If you need to view the RR database entry, click on the 'View in Browser' button at the bottom. An example of this is shown in figure 7.
- Click on the Import button. Figure 8 shows the results of the import. Be sure to edit the various functions such as name, quick keys and other items. Make sure the system or groups are not locked out.
- When available, coordinates from RR Web service are imported as well. Be sure to enable the use of this function on the system screen. All RR Web service messages are now logged (see figure 9).
- See the Limitations article for important information on limits and known issues
Return to the FreeScan User Guide

