ARC500 User Guide
From The RadioReference Wiki
Revision as of 15:05, 17 June 2014 by Butelsoftware (talk | contribs)
ARC500 software series for Radioshack PRO-106/PRO-197 and GRE PSR500/PSR600
Contents
Using ARC500 to populate a scanner
NOTE: Importing from the Radio Reference Database only works if you are a Premium Subscriber to the Radio Reference Web site. The key to unlock the utility for importing systems, Talkgroups, and/or conventional frequencies from the Database is the Premium Subscription.
Compatiblity
ARC500 is Windows software and compatible with Windows Vista/XP/7/8/8.1 (32 and 64 bit versions). ARC500 is not compatible with MAC OS.
Driver/Com port setup:
Before the customer can upload data they must plug in the Radioshack 20-546 USB cable and install the driver. The driver can be found on the cdrom that is included with the cable. The cdrom also includes scanner software demo versions. A license for the software can pe purchased at www.radioreference.com/radioshack or call 1-800-SCANNER . The scanner software demo versions on the cd-rom work for 7 days and also includes a total of two complimentary imports from the Radioreference database. Click here for the Radioshack scanner software manual in PDF format.
USB/Comport check and setup:
After installing the driver the correct COM/USB port must be selected in ARC500 before you can upload data:
- start the ARC500 software for the PRO-106/PRO-197/PRO-651/PRO-652
- enter the freq/talkgroups or import from radioreference.
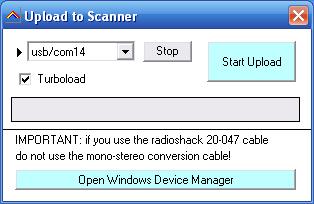
- in the top menu select SCANNER _ Upload To Scanner
- a new window is shown
- in the drop down box all available usb/com ports are shown. If there is only one usb/com port shown it is most likely the USB cable.
- if there are multiple usb/com ports listed you can open the Windows device manager by clicking the button marked 'Open Windows Device Manager'.
- a new windows opens, locate the section 'ports' and click the + to show all settings.
- locate the item marked 'USB serial Port' and note the COM number.
- This com number must be selected in ARC500
- Now press 'Start Upload'
- The leds at the interface will flash indicating it is receiving data from the software
'Nothing Enabled' error:
If the customer uploaded data and the scanner displays 'Nothing enabled' this indicates that either:
- none of the scanlists (1-20) are enabled. Scanlists can be enabled by pressing the numeric buttons 0-9 (use FUNC + 0-9 for scanlists 11-20). Try pressing the number 1 key on the scanner's key pad to enable the default scanlist 1.
- no objects are assigned to a scanlist. In the PRO-106/197 frequencies/talkgroups must be assigned to a scanlists before they can be scanned. This can be done in ARC500 or during the import process from radioreference. In the RR import window there is a tab called 'scanlists' and this defines the scanlists the objects are linked to during the import process.
Programming mode:
- The software will automatically put the scanner in programming mode. Customer should not put the scanner in program mode by holding the PGM button + power on. That is only used for firmware upgrades.
Toggling Scan Lists
To toggle scan lists off or on, use the number keys on the scanner's keypad. Scan Lists 1 - 10 are toggled by using numbers 1 - 0, and Scan Lists 11 - 20 are toggled by pressing the FUNC key and then a number 1 - 0 (i.e. FUNC + 3 = Scan List 13).
Trunk Systems
Importing Trunked Systems and Talk Groups
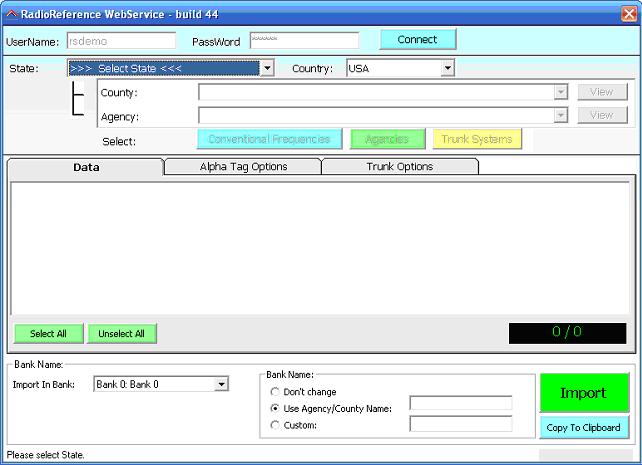
1. To Import from Radio Reference in ARC500, click Internet > Radioreference Import
2. On the next page enter your Radioreference Username and Password and then click on "Connect". The software will remember your username and password and next time you open the import window it will automatically connect.
3. Using the drop-down menus, select the State/Province and County. Next press the yellow Trunk Systems button. This will populate the Trunk System drop down list with all the available trunk systems. It now takes some time for the software to collect the data so be patient.
Change country: The default country selection is 'USA'. To change select a new Country from the country drop down menu and click 'Connect'.
4. Click on the "+" signs to expand the Site(s) and Talkgroups available for the selected system placing a check mark for those Sites and Talkgroups you want to import. You must select at least one Site to Import along with the Talkgroups or you will get a "No TSYS Assigned" warning when you begin to scan.
5. In the Scanlists tab you can select the Scanlists. (without this, the Talkgroups will not be assigned a Scan List and when you start to scan you will get a "Nothing Enabled" warning).
6. Click on the green "IMPORT" button (Any site or Talkgroup without a check mark will not be imported, so check them over before proceeding.)
WARNING NOTE: The scanner is limited to a total of 32 frequencies for a trunking system. That means that no more than 32 Control Channel frequencies or a combination of Control Channel frequencies and Alternate Control Channel frequencies can be entered per system. If all the frequencies in use on a particular site are entered, that will reduce the number of sites you will be able to enter in that system.
In an EDACS or LTR Standard system, each Site must be programmed as a seperate system. Since all the frequencies must be imported in these types of systems (instead of just a Control Channel as in a Motorola system), and since the frequencies must be in LCN order, frequencies from different sites CANNOT be mixed in the same TSYS frequency list.
NOTE: Check the Radio Reference Database for the system you are importing. Some of the Admins have better descriptions than display attributes. Remember, only 16 characters of either the description or the display attribute in the RR Database are imported. You can always change the alpha tag field yourself, too.
ANOTHER WARNING NOTE: At this point it is good practice to check the Talkgroups that were imported. Make sure the Scan List Map shows numbers indicating the talkgroups have been assingned a Scan List. If the talkgroups are not in a Scan List, you will get a "Nothing Enabled" warning when you begin to scan. The Scan List column in the talkgroup grid is where you can assign each Talkgroups to a Scan List.
8. To upload the data imported from the Radio Reference Database to the scanner, click on Scanner > Upload to Scanner. Check the usb/com port and then press 'START UPLOAD'. The scanner will reboot itself after the upload is finished and then should start scanning automatically after uploading. If not, press SCAN. You might also have to press the number 1 key on the scanner to enable the #1 Scanlist.
9. Click on File (upper left corner) > Save As... and save this information to the ARC500 folder on your computer as yourfilename.gr5
Adding Individual Talkgroups
1. Click on Talkgroup in the Object Browser.
2. Click the +/ADD button in the toolbar.
3. In the new line enter the talkgroup.
4. Double click the Trunk Systems cell. The software will show all available trunk systems.
5. Select the trunk system this new talkgroup belongs to.
Deleting a Trunk System
1. Click on Trunk Systems in the Object Browser.
2. Highlight the System to be deleted.
3. Click on the Delete button in the toolbar
Deleting a Talkgroup
1. Click on Talkgroup in the Object Browser.
2. Highlight the Talkgroup to be deleted.
3. Select Edit and then Delete.
Edit Control Channel Frequencies
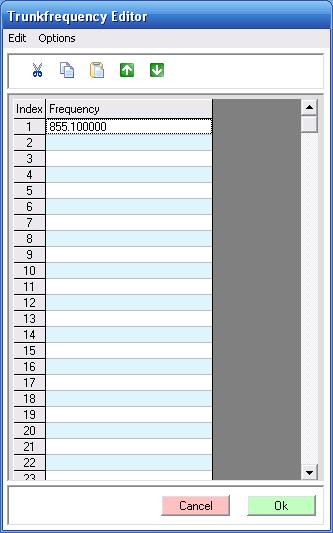
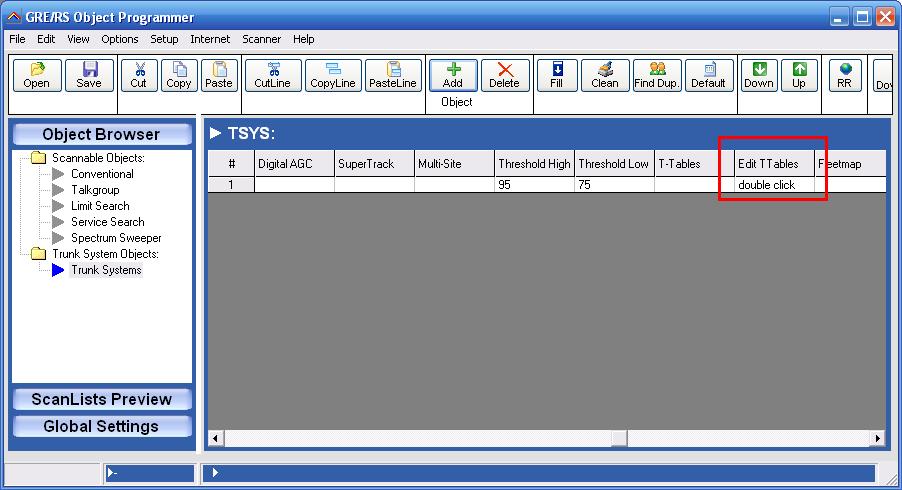
To edit the Control Channel frequencies click on Trunk System in the Object browser.
Double click the Frequencies cell.
A new window is shown. Here you can edit/add trunk frequencies.
WARNING NOTE: The scanner is limited to a total of 32 frequencies for a trunking system. That means that no more than 32 Control Channel frequencies or a combination of Control Channel frequencies and Alternate Control Channel frequencies can be entered per system. If all the frequencies in use on a particular site are entered, that will reduce the number of sites you will be able to enter in that system.
Custom Band Plan (Trunking Tables)
To edit or set a Custom Band Plan (Trunking Tables), click on Trunk System in the Object browser.
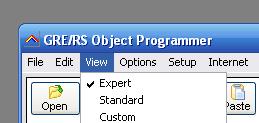
In the top menu select VIEW _ EXPERT to make sure all columns are shown.
Now double click the 'Edit TTables' cell.
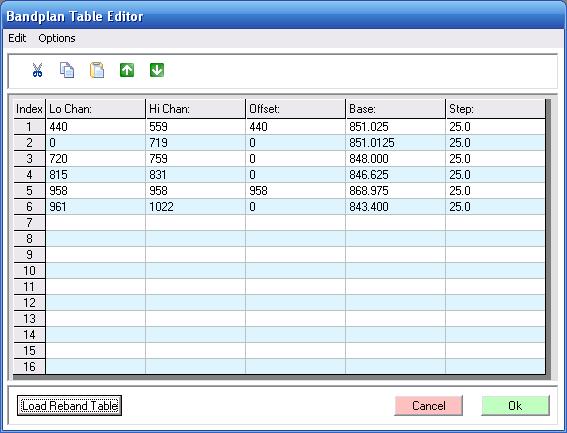
A new window is shown. Here you can edit the Custom band plan.
For rebanded systems simply press the Load Reband Table.
When you are finished programming the bandplan the software will ask you to set T-Table to custom. Select 'Yes'.
Open or Closed Mode?
Open Mode: the scanner will stop on all active talkgroups. To use Open Mode program an '*' character as talkgroup. This is also referred to as a wildcard. ARC500 will by default always add a wildcard talkgroup when you add a new trunk system. Closed Mode: the scanner will only stop at talkgroups programmed in the Talkgroup grid and linked to the selected trunk system.
Conventional Frequencies
Importing Conventional Frequency Systems
More info will be added soon, please refer to this document for help with importing conv. data s.radioreference.com/rs_help.pdf
Finished Importing - Uploading info to your Scanner
After importing the info from RadioReference into ARC500, remember to save your work by selecting File _ Save As. Then select Scanner _ Upload to Scanner in the main menu.
Make sure after making changes to your saved file, upload those changes you make in your software to the scanner and to save that change or changes to your ARC500 folder on your computer. Each time you upload to your scanner it will over-write what is in the scanner. If you want to 'add' data to your scanner you first need to read the data from the scanner in ARC500, then add the new data, save the file and then upload it to the scanner.
Saving Data to File
To save data select FILE _ SAVE. Now enter a filename. You can also use the toolbar button 'SAVE' to save a copy of your data,
Loading Data
Select FILE _ OPEN. Now locate the file you want to load in ARC500. You can also use the toolbar button 'OPEN' to load a file.
Connection problems
If the software display an error 'INIT not ok' this indicates that a firewall is blocking the software to access the internet. Add the software to the firewall safelist and then restart the PC and software. If you use 'hughesnet' satellite internet you must contact Hughesnet and have them turn off the option called 'Turbopage'.

