Entering an Unknown MOTOTRBO system using Sentinel
From The RadioReference Wiki
Note: These steps are defining a system known as SMECO or Southern Maryland Electrical Cooperative. As of this writing, this system is not in the RRDB.
Use the Favorites list editor, by either selecting it from the drop-down Edit menu, or by clicking on the small icon that resembles a star with a pencil on it, just under the w for the drop-down View menu. With the Favorites editor screen open, click on the green 'plus' sign under Systems to add a new system.
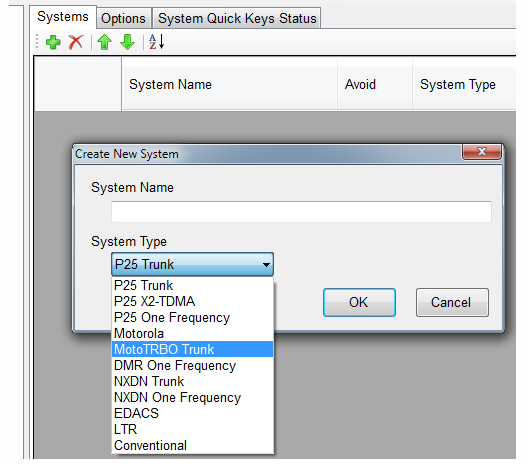
Now you can create a new system choosing MotoTRBO Trunk as the system type.
Give it a name. For simplicity, SMECO was used. Click on the system's name so that you get to where you can add departments and sites,
With the Departments tab selected, click the green plus button to add a department. Again, for simplicity, SMECO was used. For the trunked system to work, a department with at least 1 talkgroup must be entered. Since the talkgroups in use are unknown, use a dummy TGID of 1. With the Department selected, click the plus button to add a talkgroup. The service type was set as Custom 1 because that generic type is enabled by default. Other types like Utilities or Business could be used. Whichever service type is used, make sure that it is enabled in the Sentinel profile.
Now, click back on the system's name to select the Site tab & add a site. Leonardtown was used as one site.
Now, click on the site's name so that the frequencies can be added. Since the LCNs or color codes are unknown, leave the LCN field at 0, and color code set to Search. Using the steps above, also create a site for Lexington Park.
Under the Options tab for the system, be sure to set it to ID Search, since, as yet, the talkgroups are unknown.
Save the system & exit the Favorites editor. To find the LCNs and color codes, write this new system to your scanner. In the profile, be sure that the SMECO list is set to be downloaded to the scanner, and set to monitor. If it was already in the database, then append it to a Favorites list, or scan by using location control, making sure that the listed service types are enabled.
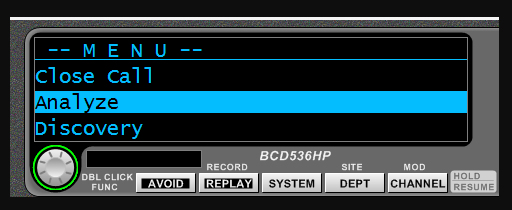
With the system loaded in the scanner, press the Menu button & scroll down to Analyze. Press E(yes) to access the Analyze menu.
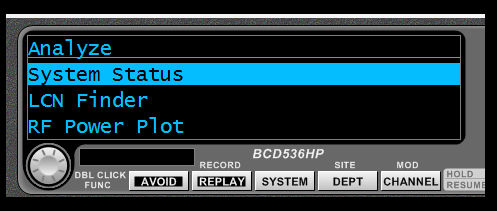
To select the System Status function, press E.
A screen will be presented where you enter the name of the system. If, instead of entering the name, you simply hit Enter, then you would see all the systems you have programmed in a Favorites list. Select the system from the list & press Enter. Or, use the Scroll knob to enter the letters in the system's name. You would only need to enter either the first letter, maybe the first few, before pressing Enter to see which systems matched what you have entered. Use the 4 and 6 keys to scroll left and right while entering the name. (For the SDS200, you can use the system & channel soft keys to scroll back & forth.) Once you have the system name selected, then you'll need to choose a site. After selecting the system, you'll see all the sites you've programmed. Choose the site you want & press E. The sites shown here are for a Dallas area system
Let the scanner sit on the site, You can get an idea of how active it is, and also see the color code used & the number of frequencies that are in use.
To use the LCN Finder instead, choose it from the Analyze menu. Here again, you'll need to enter the system name & select a site as was done for the System Status,
Let the LCN Finder run until it finds all the LCNs. Since none of the sites in your system have more than two, if it's a regular business day, it may find them fairly quickly. The local system and site used for the screenshots has ten frequencies.
Once the LCNs have been located, put the scanner into Mass Storage mode & read the information back into Sentinel. A pop-up message will appear that states the data you are reading from the scanner does not match what is in Sentinel, so tell it to save the changes, making Sentinel match what the scanner has found. Be sure & edit the system to make sure that the color code is set correctly (the System Status page would show the color code that was found).
Thanks to hiegtx for the writeup
---


